|
July's combination of high temperatures and long days puts plants under maximum stress with minimal hours of cool recovery time. How you manage soil, water, planting, and shade will make a bigger difference now than at any other time in the year.
Give both new and old plants their best shot (and make your labor go farther) by following best practices for hot weather:
The unique thing about gardens is that they’re habitat for both plants and people. Increasing the comfort, beauty, and diversity of the garden makes it better for both.
0 Comments
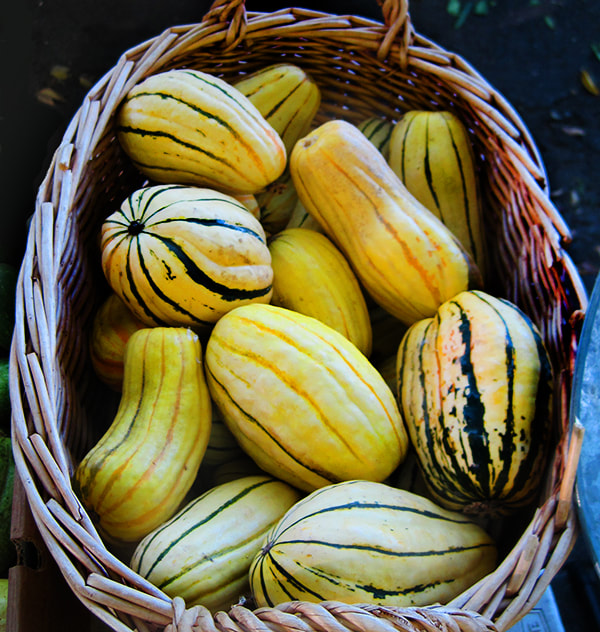
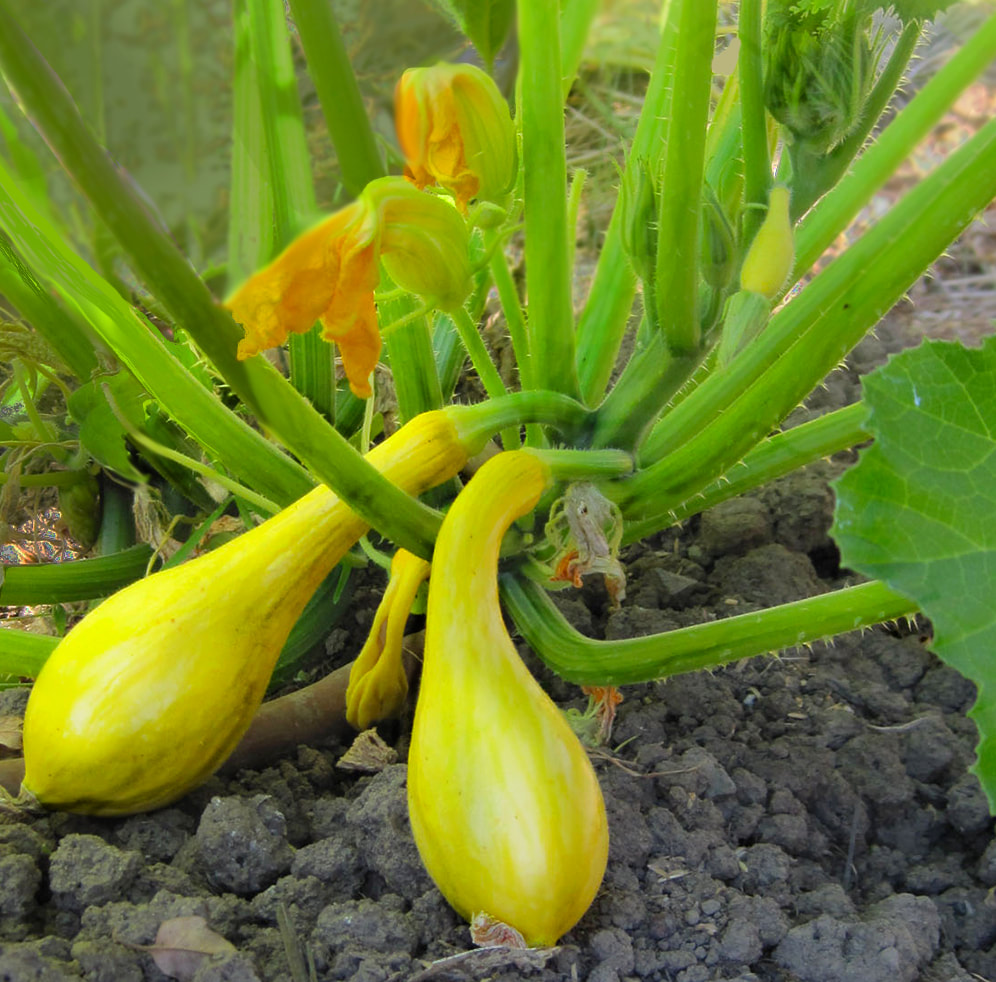
The squash family includes cucumbers, melons, gourds, watermelons, bitter melons, horned melons and gherkins as well as all the summer and winter squashes. They all come from places with hot summers, and they all thrive in heat. In gardening, it's useful to separate the squashes--large plants that originated in North and South America--from the other cucurbits of Africa and Asia. They respond to different garden strategies.
Squash seems to love growing in a compost pile. This tells you three things: It likes a lot of nutrients. It isn't picky about how fine the soil or how "finished" the compost--it will grow in stuff that's downright chunky and stinky. And it sprouts best in warm, moist places. If you add lots of compost, or bury kitchen waste, manure, or other nitrogen source a foot deep under the seeds, they will love it. Plant in clusters, called hills, of 3-5 seeds. Bush varieties can go 2-3 feet apart, vines 4-6 feet apart. If you use beds, run the hills down the middle of the bed. If you use rows, make them about 6' apart. If you are planting vining types and need to get barrows, carts, or tillers between, use rows 12' apart. After the sprouts are a few inches tall, thin to the best 3 plants per hill. Hoe out all the weeds in the bed or row, piling some dirt at the base of the plants. Mulch well with straw, leaves, hay, or piles of weeds you just pulled. Use whatever you have that can keep the soil covered and provide a steady diet of organic matter. Vining squash can be grown up a trellis to save space, or they can be planted at the edge of the garden where they can run out over a rough, paved, or unirrigated area outside the growing beds. Do not let them grow so close to corn that they try to climb it--they'll pull the stalks down. You can let the vines run amid corn, sunflower, or amaranth stalks as long as you don't let the tendrils start trying to climb the stalks--just snip any clinging tendrils. Most summer squash has a bush habit, which is compact and saves space, but is not as vigorous or drought-resistant. Speaking of drought, you will probably see squash leaves wilt and droop a bit in hot sun. This is a water-saving measure. Rather than try to keep their big leaves turgid and flat which would take a huge amount of water and hydraulic pressure from the roots, they let them droop a bit to reduce the surface area and change their angle so they're not facing the sun directly. If the plants are truly thirsty, the soil will be dry 1" down, and the leaves won't perk up when the day cools. If the leaves look normal again once the sun is off of them, they don't need extra water. The rough, hairy surface of squash leaves and stems is another water-saving measure--it minimizes evaporation from the leaves by slowing the flow of air past the surface. If squash bugs are a problem for you, sprinkle the base of the plant and all the main stems with diatom dust. All squash have separate male and female flowers on each plant. The female flowers have a small bulge or ball below the flower; this will turn into the squash fruit. Male flowers are on a longer stem with no solid ball at the base. They make pollen but no fruit. You can harvest them for the kitchen--they're edible and delicious. Use just the yellow petals (the green parts are bitter) in pasta, tacos, soups, or stuffed. Summer squash should be picked every day or two, and eaten while small (6"-8".) The reason people complain about having too many zucchini is that they let them get too big. Store squash in a dry place. Even zucchini keeps better in a dry airy room than in the fridge, where it molds. Winter squash is ripe when there is no green left in the stem--it should be hard and woody or corky--and the skin should be too hard to poke with a fingernail. Regardless of ripeness, harvest before frost or they will rot. Use any unripe or bruised ones first. The rest should be put indoors to cure for a month before eating. Delicata squash and pumpkins (C. pepo species) do not store as long, or need as much curing. Cure 2 weeks and eat before January. Squash can be stored in any dry place that stays above 50 degrees. Check often for soft spots, and don't forget to use them for soups and pasta as well as roasted and in pie. Squashes were not originally edible; they were horribly bitter, (to deter animals from eating them) and mostly provided moisture and compost for the seeds to grow in. The original human uses of these plants were for containers (gourds) and for their protein-rich seeds. It probably took centuries of patient work for the ancient farmers to transform those bitter seed envelopes into the sweet and delicious squash we grow. Breeding has also produced the summer squash, which were selected to be stay soft and free of hard seeds for longer than normal, so they have a longer window for fresh use. They will eventually grow a hard shell and mature seeds, but they are no longer palatable at that point. Winter squash are meant to be grown to maturity, with sweet flesh surrounding a cavity full of hard, mature seeds. The lower-moisture flesh and hard shell of winter squash types enable them to last for months at room temperature, making storage easy for winter eating. That said, I have stored large semi-mature zucchini (called vegetable marrows in England) for a couple of months. They weren't prime zucchini, but they were fine in pasta sauce and soup. Seed saving: Insect-pollinated, requires at least 500 ft isolation in home gardens (1/2 mile if selling seed.) Our offerings include 3 species: Cucurbita pepo (pumpkin, delicatas, acorns, and most summer squash), Cucurbita maxima (Buttercup, Lower Salmon River, Stella Blue, Zapallo), and Cucurbita moschata (Butternut, Tromboncino.) Members of the same species will cross with each other, but not with other species. So if you have the isolation to grow squash seed, you can have one of each species and still save seed. Cucumbers, melons, and watermelons are members of the squash family from India, Persia, and Africa. Their vines are on a smaller scale than squash, with less rampant habit. They prefer a lighter, more cultivated soil than the big squashes and their sparser vines don't shade out weeds like the larger squashes do. You will need to mulch or weed the bed to prevent weed competition. All of them love heat and are adapted to dry climates. Originating from the desert, they are adapted to a rhythm of hot days and cold nights, but they will not sprout until the soil is warm. I usually wait until 2 weeks after my last frost date to direct-sow. I find that cucumbers (from India) enjoy a bit of afternoon shade, needing heat but not blasting sun. Melons, on the other hand, are sun-lovers that thrive in a heat. The history of melons and watermelons goes so far back it's hard to tell what they were like originally--we know that the ancient Egyptians ate watermelon 4,000 years ago. None of these plants resemble their small, unpalatable wild ancestors; all were transformed by the breeding work of ancient farmers. Money is tight for many of us, and the garden can make a real contribution to the household. What crops you grow, how you plant, what inputs you use, your timing, and equipment all make a difference.
What to grow: Consider how much space is available, how much time you have, and what your household would actually pick, cook, and eat. Everyone's choices are different, and there are many good answers. What isn't helpful is to garden haphazardly, planting the same old stuff without considering what you hope to get out of your garden and your labor. There are three approaches to making your garden contribute economically.
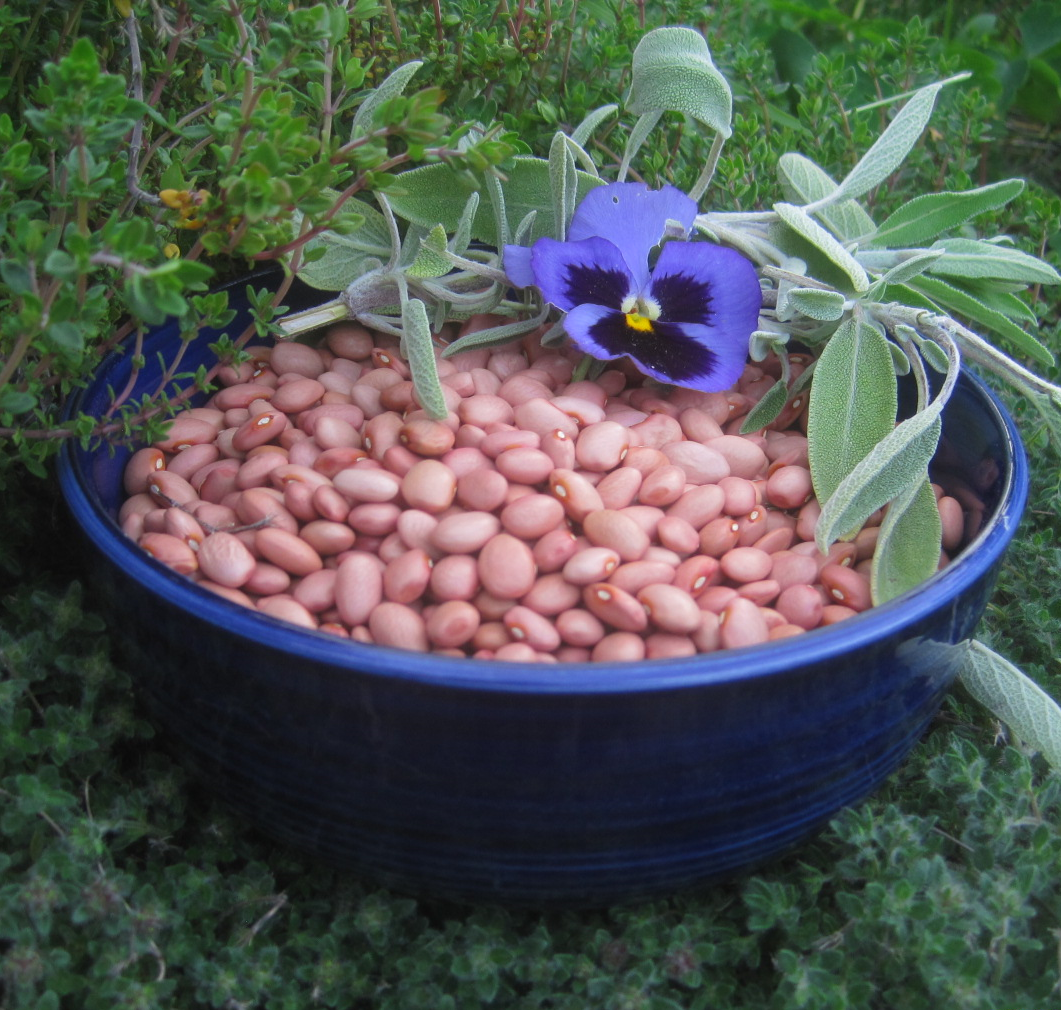
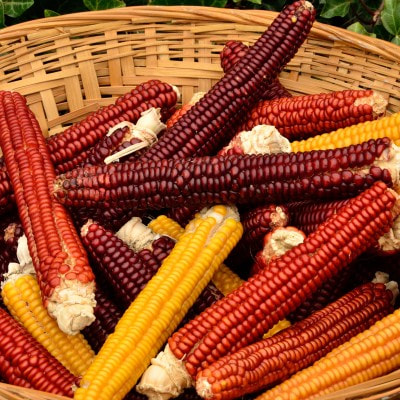
Culturally significant crops are priceless. They often can’t be bought, or can only be bought at high prices in small amounts. Some of the heirlooms we carry that people seek out for their cultural significance are Zapallo del Tronco summer squash, Mentuccia Romana herb, Epazote herb, Round Valley Beans, Puntarelle, Pineapple Tomato, Green-in-Snow (Xue-le-Hong), Old Timey Blue Collards, Miner’s Lettuce, Floriani Corn, Cajun Jewel Okra, and King City Pink Beans. Growing the highest-priced items (or most often bought items) in your family’s diet is a good strategy for a small garden. Here are the most common.
To grow the most calories and nutrients, look at what peasant families have grown through the ages.
Out of all these, the crops that can provide the most meals per unit of space are flour corn, quinoa, potatoes, yams, rutabagas, beets, onions, dry beans, cabbage, mustard, collards, chard, and leeks. How you grow makes a huge difference.
Supplies and inputs:
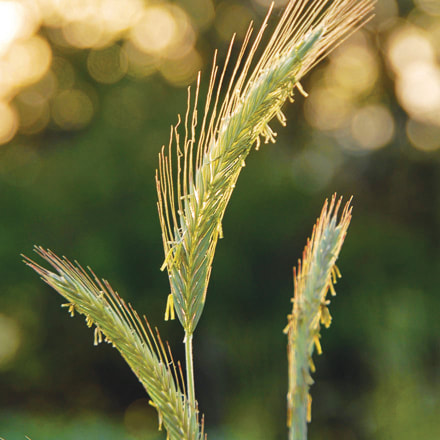
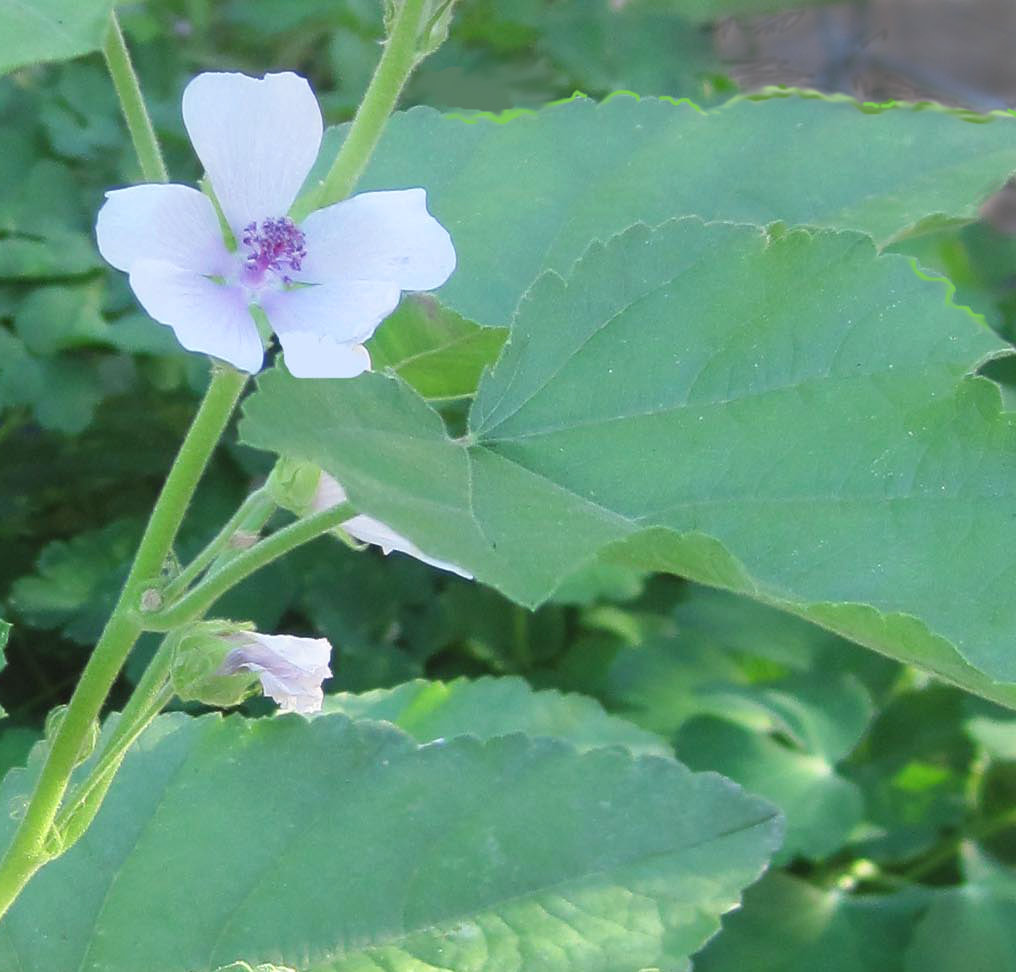
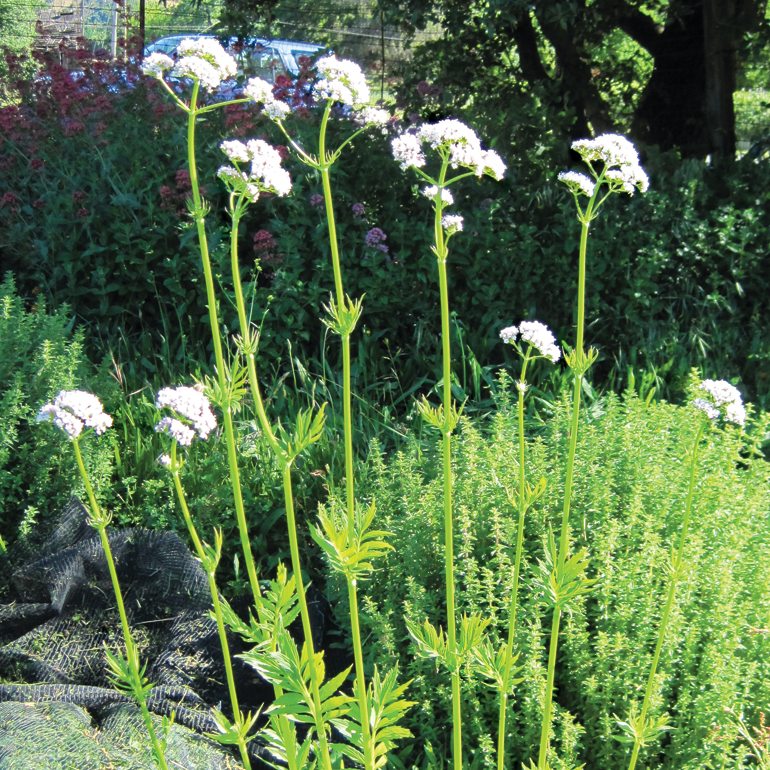
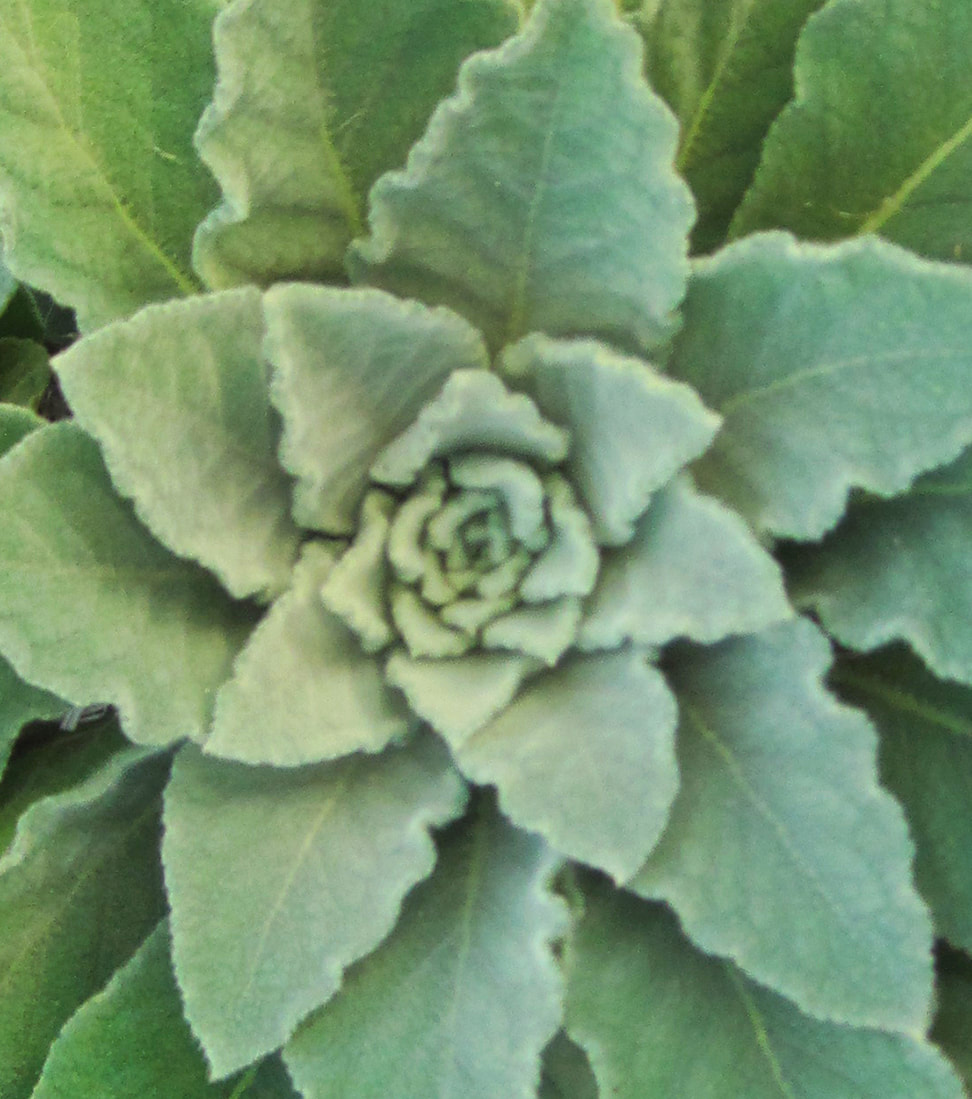
Fall is planting time for grains, vegetables, herbs, and flowers native to dry Mediterranean climates. Wheat, Poppies, Mullein, and Fava beans are examples of crops from that growth pattern.
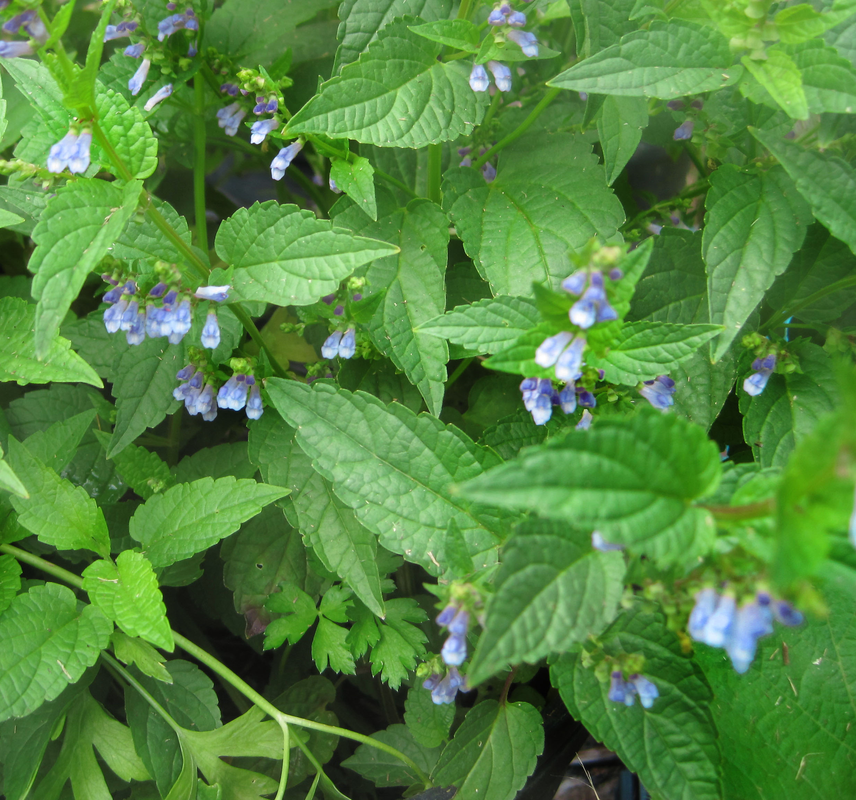
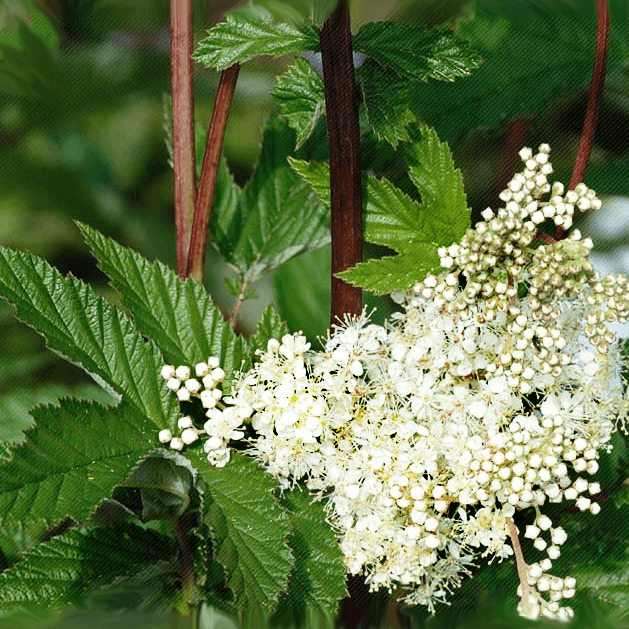
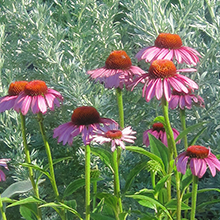
In colder, temperate climates, there are many perennials that drop their seeds in late summer, spend the winter in cold moist soil, and sprout as the weather warms in spring. Plants that started life in cool coastal climates seldom thrive in very hot dry weather. Instead, we grow them in spring or Fall, mimicking the fog of a cool oceanic summer. When you add all of these plant types together, the number of seeds that like to be planted into cool soil is about as large as the number that like heat. Any experienced gardener knows that lettuce, cabbage, peas, spinach, and so on are a major part of the gardener's year. But fewer gardeners realize how many flowers and herbs should be fall-planted. You can see the choices HERE Poppies are an example of an overwintering annual. Planted in the Fall, they can make a rosette of leaves before growth stops in winter, and a strong deep root. When the weather warms up, that established plant gets big and blooms profusely. (Zones 4, 5 and 6 should plant in very early spring--you can sprinkle seed on the snow.) Seeds planted in warm spring weather will still bloom, but the plants will not be as large and the number of blooms correspondingly smaller. Echinacea, Anise Hyssop, Marshmallow, Valerian, Nettle, Meadowsweet, Good King Henry, and Bee Balm are examples of temperate plants that sprout better if they go through the winter in the soil rather than in a dry warm place. You can sow them in deep pots and leave them out to get snow and rain, but protect them from rodents and birds. As the days warm in spring, they will sprout. Kale, Arugula, Spinach, Escarole, and Cabbage are familiar vegetables that thrive in damp, cool maritime weather. Some herbs and flowers that share this trait are alyssum, calendula, nasturtium, violets, delphiniums, daffodils, clover, mint, astragalus, chervil, cilantro, and fennel. When planting for fall and winter, there are a few things you can do to speed up the process and give your plants their best chance.
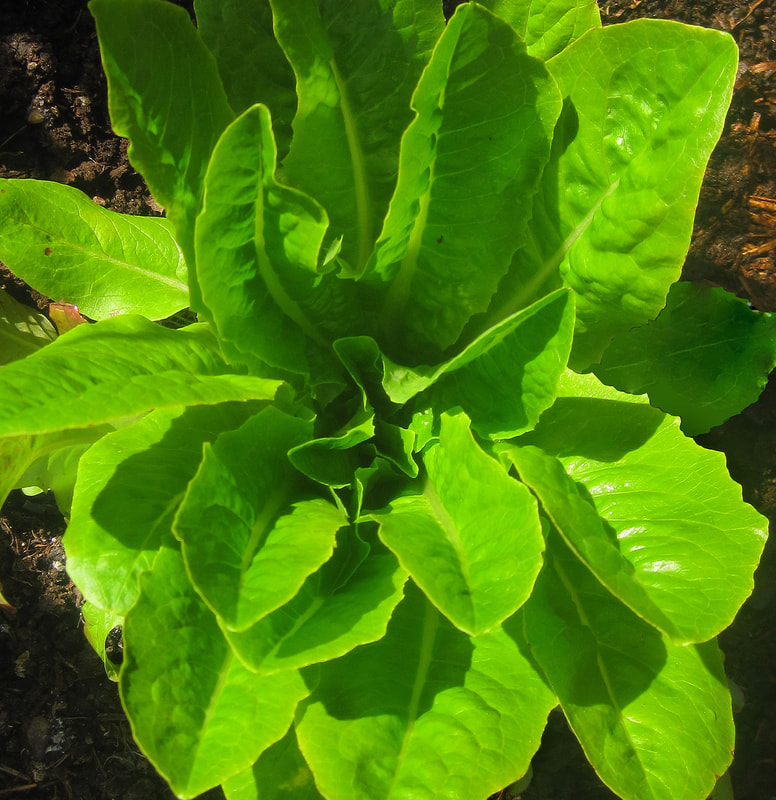
 A juicy salad is just what we want in summer. But growing it can be a challenge:
Lettuce seed goes dormant in hot weather; often the seeds either don't sprout or come up unevenly. When you do get lettuce plants, they often turn bitter, or stop making leaves and just elongate into a flower stalk (this is called bolting.) Lettuce is naturally a spring crop, adapted to cool soil and short days. But people love lettuce, and over the years, gardeners and farmers have learned how to grow it in summer. Here are tricks to grow summer lettuce. The more of them you use, the easier it will be to harvest salads all summer.
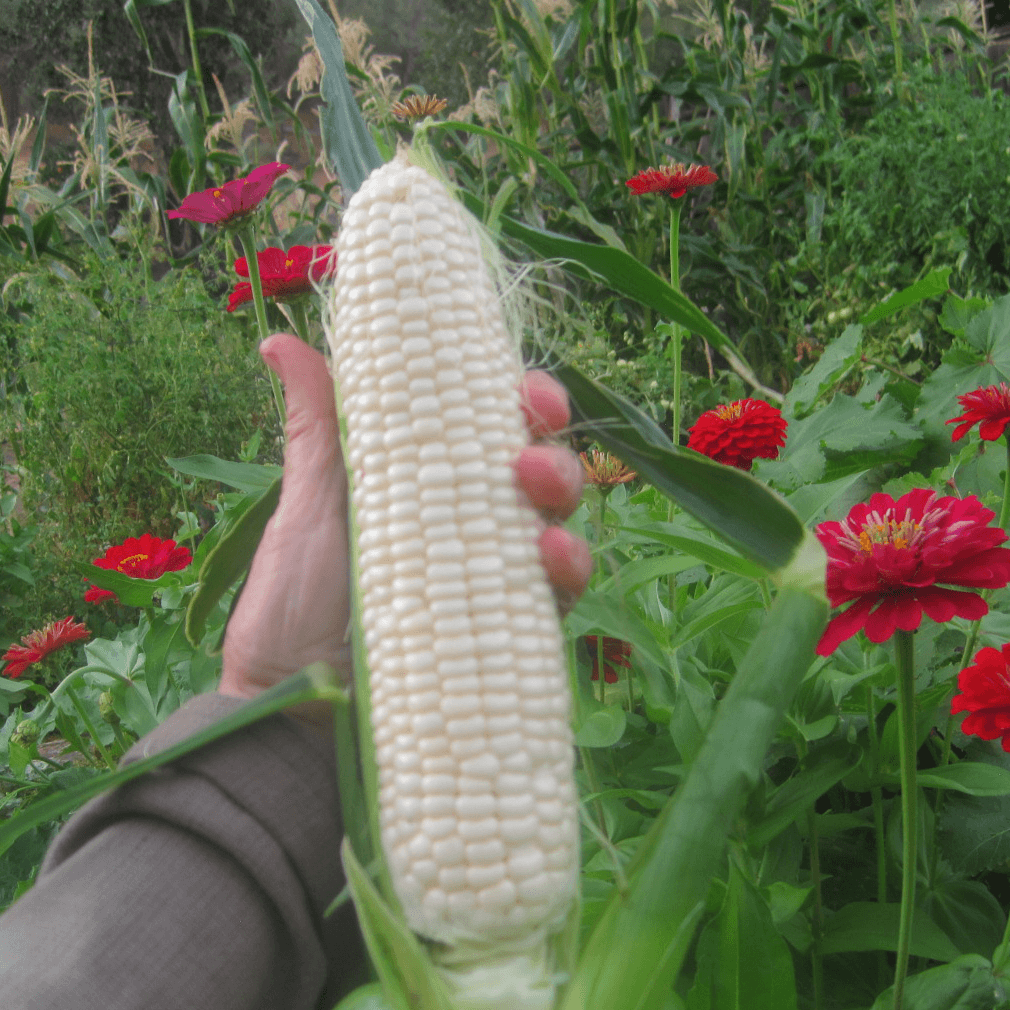
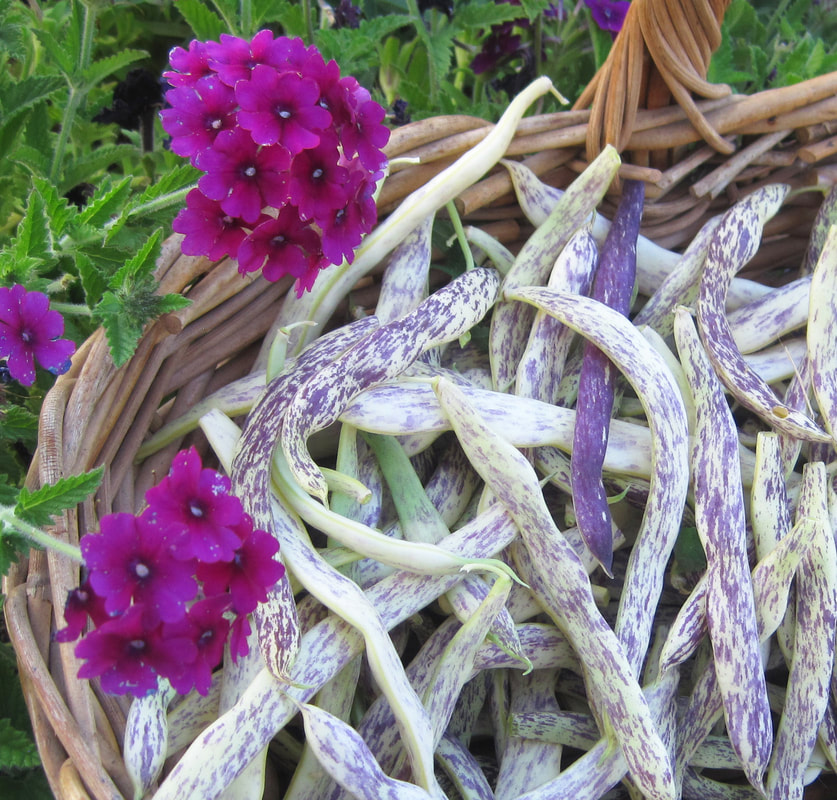
I love that you can grow a whole meal with beans corn and squash---protein, bread, vegetable and desert. And you don't have to do anything special to store them. After all the canning and preserving I've done, it's great to grow things that can just sit on the counter all winter, ready to use. All three of these crops have varieties for eating fresh (sweet corn, green beans, zucchini) and for varieties for effortless, room-temperature storage (flour corn, dry beans, winter squash.) It's well worth planting both kinds. I love that the Four Sisters (corn, beans, squash & sunflowers) can be sown direct in the ground. I gardened for two decades before I grew these plants (Alaska was too cold) and once I had a bit of warm dirt, I was enchanted by the simplicity of it--make a hole, put in a seed. Not a little, has-to-be-thinned-on-your-hands-and-knees kind of seed, but a big fat seed you could see and hold between thumb and forefinger. Then up comes a big, fast-growing, plant that shoulders aside obstacles and grows. In addition to the simplicity and fun of it, my experience has been that direct-sown plants catch up with transplants, and may have a deeper, more drought-resistant root system. But if you need time to get the garden ready for them, or need to avoid weed or pest pressure on your seedlings, transplants are a good option too. It's mostly about what you enjoy doing, what you have space for, and when you have time available to plant. If you do start them in pots, 2 or 3 weeks ahead of transplant is plenty. Their roots need room, and more than a month in the pot will stunt them. Soil preparation for New World crops is easy. These crops were perfected by people who used a digging stick and a hoe--no tractor, no plow, not even a spade. They don't need a perfect fine powdery seedbed. What they do need is organic matter. These crops originally were grown in forest clearings, in soil created by centuries of fallen leaves--full of organic matter and fungal mycelium. (This post has more on how New World crops differ from European crops.) Once they're growing, summer crops vary more than you might think. They all need warm weather and are killed by frost, but they like different niches. The traditional ways of growing them recognized this. The Three Sisters of North America and the Milpa agriculture further south planted these crops together. This creates different niches. Instead of everything growing spread out with direct sun from all sides, there are different degrees of dappled shade, of wind exposure, of moisture, and so on. In the cloudy wet climate of Northern Europe, getting enough sun was a problem, and plants spread out in rows without any shade was a good idea. In much of North America, our seasons are much more extreme. Unless you live in the fog belt all summer, try giving your plants some shelter from brutal sun and wind. Try letting them take care of each other. 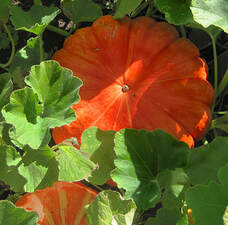 Squash seems to love growing in a compost pile. This tells you three things: It likes a lot of nutrients. It isn't picky about how fine the soil or how "finished" the compost--it will grow in stuff that's downright chunky and stinky. And it sprouts best in warm, moist places. When you're planting squash is the time to bury your kitchen waste, a few inches below the seeds or transplants. Then mulch well with straw, leaves, hay, or piles of weeds you just pulled. Use whatever you have that can keep the soil covered and provide a steady diet of organic matter. Vining squash can be grown up a trellis to save space, or they can be planted at the edge of the garden where they can run out over a rough, paved, or unirrigated area outside the growing beds. Do not let them grow so close to corn that they try to climb it--they'll pull the stalks down. You can let the vines run amid corn, sunflower, or amaranth stalks as long as you don't let the tendrils start trying to climb the stalks--just snip any clinging tendrils. Most summer squash has a bush habit, which is compact and saves space, but is not as vigorous or drought-resistant. Speaking of drought, you will probably see squash leaves wilt and droop a bit in hot sun. This is a water-saving measure. Rather than try to keep their big leaves turgid and flat which would take a huge amount of water and hydraulic pressure from the roots, they let them droop a bit to reduce the surface area and change their angle so they're not facing the sun directly. If the plants are truly thirsty, the soil will be dry 1" down, and the leaves won't perk up when the day cools. If the leaves look normal again once the sun is off of them, they don't need extra water. The rough, hairy surface of squash leaves and stems is another water-saving measure--it minimizes evaporation from the leaves by slowing the flow of air past the surface. Cucumbers, melons, and watermelons are members of the squash family from India, Persia, and Africa. Their vines are on a smaller scale than squash, with less rampant habit. They prefer a lighter, more cultivated soil than the big squashes and their sparser vines don't shade out weeds like the larger squashes do. You will need to mulch or weed the bed to prevent weed competition. All of them love heat and are adapted to dry climates--in nature, the juicy fruit provided water for the seeds to sprout after the fruit fell to the ground. Originating from the desert, they are adapted to a rhythm of hot days and cold nights, but they will not sprout until the soil is warm. I usually wait until 2 weeks after my last frost date to direct-sow. I find that cucumbers enjoy a bit of afternoon shade, needing heat but not blasting sun. Melons, on the other hand, are sun-lovers that thrive in a hot day/cold night climate. There are also melons that have been selected for eating like cucumbers when immature. They are used just like cucumbers, and are preferred by many because they are bitter-free and easy to digest. They are quite early because they are eaten when very young, but they do need heat. They type we carry is an Italian heirloom carosello that's early and has outstanding flavor. 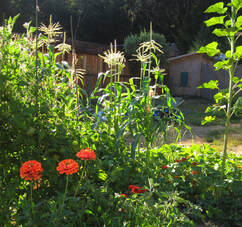 Corn is a giant grass, and needs water and fertility to fuel it's fast growth. It is traditional to give it a source of nitrogen in the furrow or hill. (A hill is just a group of seeds planted in a cluster rather than spread out in a row.) Manure, compost, alfalfa meal, fish hydrolysate, blood meal and many others have been used. However, the heirloom and open-source corns we carry are thrifty plants that were not bred for excessive inputs. Good garden soil with compost at planting time and again at tasseling should be fine in most situations. On the traditional farm or homestead, hoeing weeds out of the corn was a constant summer job. In the garden, you can often hoe once and then mulch to keep weeds down and root competition at a minimum. Another approach is to plant clover or beans as a nitrogen-fixing understory. Corn uses sunlight in a way that's unusual in our gardens but more common in tropical plants, called C-4 photosynthesis. Plants that use C-4 photosynthesis have a different structure and chemistry that enables them to keep their pores closed during the heat of the day, minimizing water loss and enabling them to harvest large amounts of energy in sunny weather. This trait makes corn and sorghum extremely fast-growing and productive right through hot weather and midday sun. In the traditional "Three Sisters" garden, corn provides a trellis and some light shade for pole beans, while the beans enrich the soil and squash shades out weeds. You can see them in the photo--no bare soil, beans growing up the taller of the two corn varieties; zinnias and sunflowers at the edges. Corn, in it's turn, turns direct sunlight into sugar, some of which it secretes from its roots to feed the others. To make this work, you need a tall variety of corn with stout stalks to support the weight. With the shorter varieties of corn, use bush or semi-runner beans. Use shorter beans also with sweet corn, so you can pick the corn and beans for fresh use. Traditional three sisters gardens, with storage varieties, went undisturbed until the end of the season when the crops were dry. Many of the older heirloom "bush" beans are actually short vines, called semi-runners. They are perfect for a 5' corn plant. King City Pink Beans and many of Carol Deppe's beans are examples of the semi-runner trait. This post has more on Three Sisters gardens. 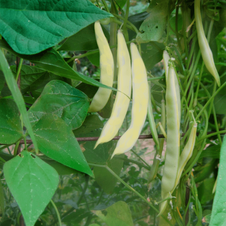 Beans are renowned for their ability to enrich the soil. Colonies of special bacteria in their roots are able to use nitrogen from the air as a food for the plant. But as Will Bonsall has pointed out, the roots can't climb out of the soil to access that air--there has to be aeration in the soil. Compacted, hard, mineral soil doesn't have spaces for air. Organic matter provides the meeting place of soil, air, and water where roots can make optimum growth and nitrogen-fixing bacteria can thrive. In tillage systems, this is provided by tilling or spading-in compost, manure, shredded leaves, etc. In no-till systems, the tunnels made by earthworms, last year's roots, and other living things aerate the soil. Once the beans are up and you can see all the little plants, hoe the bed well (but shallowly--the roots are near the surface) and mulch between the rows. Weed competition decreases yields appreciably. I like a thick band of straw that prevents weeds from growing back and keeps bush beans from falling over as the pods get heavy. Even pole beans are sensitive to root competition and should be well mulched. This will also help keep the soil aerated, both by worms and by preventing sun and water from hardening the surface. Bean plants enjoy the same temperatures humans do. They need warm soil and temperatures above freezing, but they overheat in temperatures above 85 degrees. When it gets too hot, you can see them swivel their leaves so that the sun strikes the leaf edges rather than their top surface. In hot-summer areas, it's important to choose the right varieties (Rattlesnake is particularly known for heat-tolerance. We don't carry the famed Pacific Northwest variety Blue Lake because it doesn't bloom or make fruit over 85 degrees.) You will get better yields during hot weather if you position beans where they get afternoon shade, or else use shadecloth. The type that casts 30% shade is best in most places. I use 30% shade and prefer the more durable woven type. You don't need fancy installation. I use bamboo stakes stuck into the ground at the corners of the bed and slanted strongly outward to counteract the weight of the cloth. A rubber band, clothespin, or a string and clove hitch will secure the cloth to the pole. 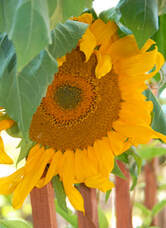 Sunflowers are unusual in that they can sprout in cold soil. So you can start them first. If you want primarily flowers, make two or three plantings, say in April, May, and June. You can also prolong bloom by cutting off the flowerheads when the petals drop. Of course if you want seed, you need to leave them to mature. In order to beat the birds to the seeds, harvest the minute the seeds are hard and loose in the head, or cover them with bags to foil seed-loving birds. Sunflowers make just as good a scaffold for pole beans as corn does. Or for a really spectacular planting, try sowing morning glories at the base of the sunflower stalks once they are about a foot tall. This post has more on sunflowers. Zinnias are another summer staple in the garden, for pollinators, cut flowers, and general joy. They are also a New World crop, from Mexico, and are easy to direct-sow along with your corn, beans, and squash. I like to poke some seeds in at the ends of each row. The varieties we carry are the taller types that can rise up above a row of bush beans or lettuce, and hold their own at the end of a row of corn. The flowers are big and bright enough to see from a distance, too. Those are zinnias in the foreground of the 3 sisters picture above, and in the background of the ear of corn at top. I can think of few things that give so much pleasure for so little effort. 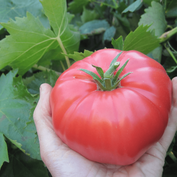 Tomatoes are the quintessential summer crop, so it's easy to think they can soak up all the sun there is, and just pump out more and better harvests. Certainly that's the idea behind pruning and trellising them. If you live in a cloudy climate that's absolutely true. In much of the West, however (and increasingly elsewhere) they need all their leaves to shade the fruit from sun scald. And may need additional shade during hot spells. Try watching them and the forecast. In high heat, they often drop their blossoms because they are too stressed to make fruit. You can prevent blossom drop by giving shade when the forecast is for temps over 90. Above 90 degrees, these plants shut down. So give them a break (and give yourself more consistent harvests.) Have shade cloth handy. If you know they will need a little shade break every afternoon, you can position them so they get it. Try planting on the east side of a corn block. They'll get that important morning sun to get them making sugars and growth, then a break when heat gets high in the afternoon. Or maybe there's a spot where trees cast some afternoon shade. Use it. Do you have a patio or porch with morning sun and a few hours of shade at midday? If you aren't sure of the best position, put one or two plants in each of your possible sites and see which works best. Mulch is even more important with tomatoes than with other crops because fluctuating soil moisture causes cracking and blossom end rot in the fruit.  Where I live (cold springs, heavy soil, bad sun scald) peppers do best in 3 to 5 gallon pots. The plant in the photo at left is in a pot with a mulch of small stones to preserve soil moisture and retain heat into the night. Plants in pots warm up fast in spring, can move to a spot with afternoon shade in hot spells, get full sun when the season cools off, and move to the greenhouse, porch, or indoors to ripen in fall.
Consider pairing peppers with bush beans, basil, or other bushy companion to give shade from the side, where the hanging peppers are vulnerable to scald. Sun from directly above seems to be more to their liking. I think they evolved down in arroyos, beside little creeks, and like to have sun straight down on their canopy but not under it. Just a guess, but that's what works for me. The types that bear peppers on sticking up on top usually come from cloudier climates, while the peppers from desert climates with bright unfiltered sun generally hang down below the leaves. In traditional milpa plantings, they are in among taller plants like corn, or surrounded by beans, or under the dappled shade of tomatillos. I've seen farmers bend taller plants to cast a light shade right over their peppers. It keeps the fruits safe from scald and the plants keep flowering and fruiting through hot spells. The traditional first plantings of spring are spinach, peas, lettuce, and greens. What gardeners love about them is that they grow very fast in spring, are ready to eat in just over a month, and taste wonderful. In the past, these crops were often the first taste of something fresh after a winter of dried and salted foods. They are still a spring treat and a health boost today. Their juicy crispness is the outward sign of the vitamins, fiber, hydrating gels, anti-oxidants, and myriad other compounds that make us feel better. All of these plants need to grow quickly before heat sets in, so they need adequate moisture and fertility. However, they also need enough warmth to fuel growth, and good drainage. Oak trees leaf out when the soil and air temperatures are right for peas and greens, so watch the trees in addition to the calendar. Peas, spinach, and lettuce enjoy a less acid soil(pH 6.5 to 7.) Traditional practice has been to dig the bed over and incorporate manure, compost,or other sources of organic matter, along with some wood ash or lime. No-dig methods instead use a layer of compost on top of the soil, into which the seeds or transplants are planted. (If the soil is very acid, ash or limestone can be spread as well.) If soil is unseasonably soggy, and too wet to dig or to plant into, I suggest either making your first plantings in containers, or dumping compost/potting mix, on top of the ground and planting into that.
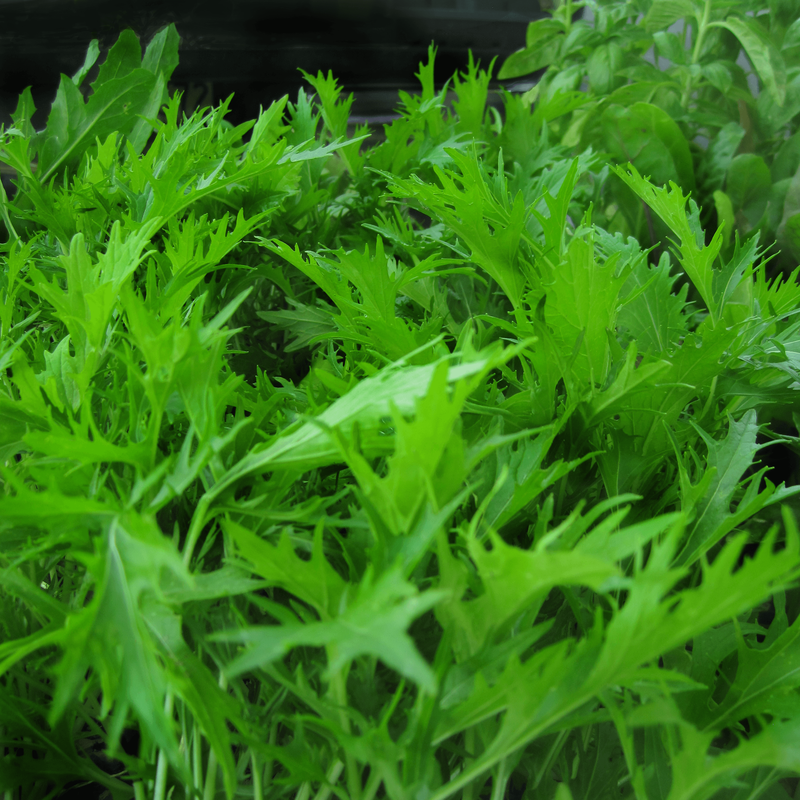
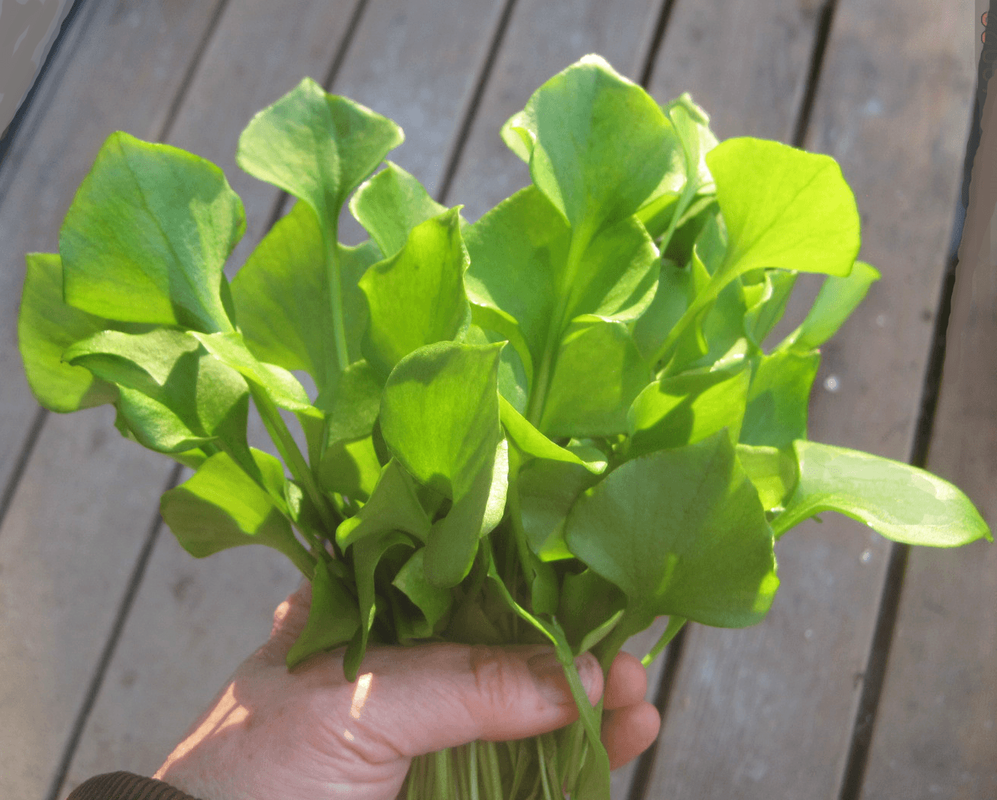
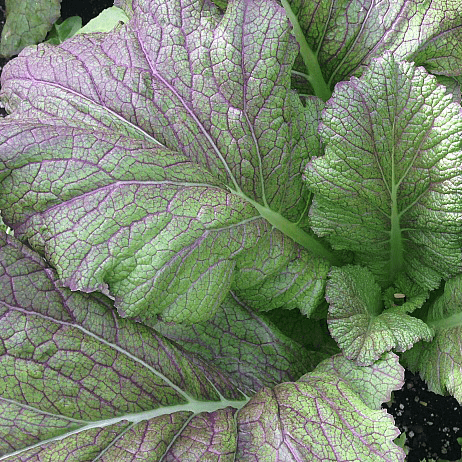
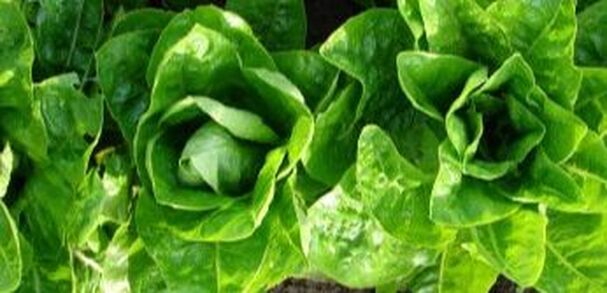
The fastest-growing salad of all is a little California native called Miner's Lettuce. It grows wild in my garden under a big black walnut tree. It's rare to find an edible plant that is both shade-tolerant and tolerant of the poisons secreted into the soil by walnut trees. Amazingly, it has a very mild flavor and juicy texture that has made it a favorite of chefs. It is always my first harvest of the year. Spinach loves cool weather and and needs quite a bit of moisture to start. Indeed, if your soil is dry, I suggest soaking the seeds for an hour or two. It should be planted now for a spring crop, and again in the fall, as it is adapted not only to cool weather, but to short days. The longer days of summer will make it bolt and taste strong. Lettuce is the simplest of all to plant and use. A fast-growing, cold-tolerant variety like Emerald Fan, Bronze Arrow, or Hungarian Pink Winter gives you salads very quickly, with the tender texture that is the hallmark of spring. Like most greens, it needs to have space to develop without check. If you will not be able or willing to get down and thin your lettuce, consider transplants. It's easier to thin little pots or trays at table height, and they can go into the ground with room to grow. Peas are the only one of the bunch that takes two months to crop instead of one. But the new practice of harvesting pea shoots means that even peas can be giving you a harvest quickly. Whether for shoots or pods, peas are easy but not terribly vigorous, so it's good to know their quirks. In cool spring weather, they should be planted more shallowly than other legumes, about 1/2 inch deep. (Late summer plantings should be deeper to take advantage of moisture further down.) They can be transplanted with care when very young, if conditions outside are too wet, windy, cold, or unready, And they need support. Peas are climbing vines, and don't do well sprawling on the ground. Even very short "bush" varieties are vines, and will not stand up on their own. Short varieties can do well in tomato cages, while taller sorts need a trellis or fence. You should view the heights in seed listings as possibilities, not facts. Cooler weather means the vines will keep growing, while hot or very cold weather will stunt them. Last year's cool spring meant that my Cascadias, normally 4' tall, grew to 8 feet. Further, they climb in a special way, which needs the right support. Beans, morning glories, and some other vines grow by twining; they'll go round and round a pole in a spiral. Peas will not. Vertical supports are almost useless to them--they need a ladder. They make hand-like twigs called tendrils that grab onto supports as they go. For peas, you need to provide support with horizontal wires, woven branches, bushy twigs, or other horizontal or diagonal handholds a foot or less apart. Pig wire or concrete reinforcing wire works well. Posts with sisal or hemp twine are great; you can cut the twine and compost the entire mass, twine and all. The turnip/mustard tribe, and has flavors that range from mild to fiery. I like Mizuna and Mizpoona Salad Select for early salads. The fiery mustards like Green Wave, and Dragon Tongue are tamed with cooking, gaining rich complex flavors that are traditional complements to cheese or pork. Carol Deppe once made a quick, dense planting of Green Wave Mustard in a layer of compost spread on her concrete driveway. The planting was cut & processed all at once for freezing. (Detailed in The Tao of Vegetable Gardening.) It would not be an option for long-term or repeated harvest, and needs cool, damp weather. But it put the compost to work until she was able to use it in the garden, and gave a huge crop that stocked the freezer. It shows that given moisture and fertility, these fast growers can make a lot of food in a small amount of time and space. See the possibilities here. This week, I'd like to spotlight tips for two specific vegetables that you may be starting now--tomatoes, and the cabbage/broccoli family. (AKA cole crops--as in coleslaw.) These are probably the most popular vegetables for starting indoors for transplant later. That word "transplant" is one of their key similarities. Both tomato and cabbage/broccoli seedlings have many small, flexible, fibrous roots. Their root systems increase by making more and more small roots, which form a mat around the plant, rather than the existing roots getting larger and deeper. What's more, new roots can sprout from any stem that is touching the ground, not just from the original root. This is a key characteristic for plants that cope well with disturbance. In nature, disturbance might come from erosion, flooding, landslides, or animal activity.  In the garden, a prime disturbance is transplanting. Tomatoes and cabbages often show increased growth when transplanted, because their roots are stimulated to new growth by disturbance. Setting the seedlings a bit deeper at transplant gives the roots more soil to colonize, and takes advantage of their ability to make roots from the stem (adventitious roots.) Other plants with different root types resent transplanting. I have written about the various root types HERE Even if temperatures are warm enough to start seeds of these vegetables outside, you save space, water, and nutrients by starting them in containers (pots, flats, module trays, etc) or in a nursery bed. It also gives you more time to prepare their final destination in the garden. As I write, snow is falling and my road is closed. That brings to mind another factor in seedling success--heat. The plants themselves differ widely in hardiness--a tomato plant can't take any frost at all. The seeds need soil to be at least 60 degrees for sprouting, and sprout fastest at 85 degrees. Given that moist soil will be about 10 degrees cooler than the air, heat mats do improve germination, even in the house. Their relative, peppers, need even more heat and will be stunted for months if they experience too much cold as seedlings. Kale and cabbage are mainstays of the winter garden, famous for frost-hardiness. However, if you've ever let one go to seed, you might have noticed that after overwintering, they bloom in spring and the seed matures in midsummer. Their seeds fall onto warm soil. Biennial kale and cabbage need a minimum of 55 degrees for sprouting, and sprout fastest at around 85 degrees--just like tomatoes. Broccoli is the same species as kale, but bred into an annual form that sprouts and blooms all in one season. It will germinate in cooler soil--around 45 degrees--than it's biennial relatives. Many annuals from Asian and Mediterranean regions are better adapted to cold soil, because in their homelands, they needed to grow and finish before the soil dried up in summer. Peas, lettuce, Asian greens, favas, turnips, endive, and cima di rapa sprout best and are tastiest in cool weather. Started in modules or flats, you can be eating them in just over a month in spring weather, and even faster if you start some in a tub in a window indoors, where you can clip young leaves as they form. 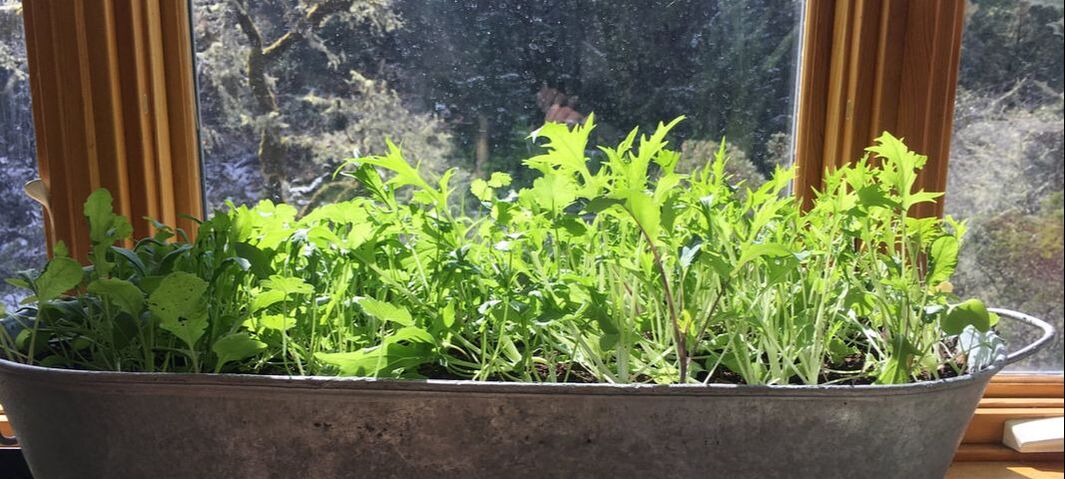 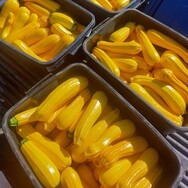 Carol Deppe developed her new Goldini II zucchini to be used both as a regular summer squash and as a dried winter staple. She had noticed that most modern summer squash didn't taste good when she dried them in her dehydrator. She knew, however, that Native American peoples dried slices of squash as a light, portable, winter food. So she started breeding with tastier, larger (less labor in cutting and picking) and more versatile zucchini in mind. Here are her suggestions on how to use her new squash for drying:
"Most zucchinis have a bland flavor when dried. Goldini Zucchini II has a unique spectacular flavor quite different from the raw or cooked squash or anything else. Prime size for drying is about 0.8 lbs to 3 lbs. The dry squash slices or powder can make unique and delicious soups and stews. Slice 3/8” thick for slices that take about 45” to reconstitute boiling water or in a soup or stew. Slice 1/8” thick for vegetable chips to use as dippers. Slicing in a salad shooter gives very thin small slices that reconstitute and cook in about 5” in a soup or stew. For larger squash with more mature seeds, halve and remove seeds before slicing and drying. Dry in a dehydrator at 95 F, an oven on low, in the sun, or on seed racks in the sun. You can grind the dried slices in a coffee grinder to make a powder that is a good base for instant soups and stews. Store dry squash in air-tight containers. See The Resilient Gardener for complete information on making and using dry summer squash slices as a long-storing staple." I don't sell tools or books, and I don't get any kickbacks from anyone for my recommendations. I'm just an opinionated gardener with a few suggestions.
Not all tools are designed as such. Our most-used tool is probably a simple bedsheet. I pick them up at the thrift store, and we use them in a zillion ways. Need some shade for your seedlings? Bedsheet on sticks does the trick. Weeding? Spread out a sheet and throw the weeds on it instead of having to carry a bucket. Hauling brush to the burn pile or straw to the compost? Fill a bedsheet with the load and gather up the corners for a big carrying sack that dumps easily. Working next to a patio or sidewalk? Protect it from mud with a sheet. Kids playing with blocks or legos and then don't pick them up? Solve that with a bedsheet too--lay it down before they start, then just gather up the corners instead of dozens of pieces. Cleaning seeds, sorting your recyclables, etc etc etc.......sheets make it easy. Another standby is cardboard in all sizes. And when weeds get out of hand, a black tarp is often the solution. I think bamboo poles in every size from 4' to 10' are a great investment. We use them constantly, for trellis, stakes, tripods, shadecloth, and so on. The short-handled tools are the ones I often reach for first. They are like a more powerful hand, and good ones become friends. These are hard to find in stores, and make great gifts. Our favorite supplier is Shovel and Hoe. They use the tools themselves, have a large selection, and are very helpful.
We manage the garden with no-dig, no-till methods, but do a fair amount of tree planting, compost turning, terracing, weeding & weed cutting, leveling, building, and other tasks that require digging or cultivation tools. The right tool can make the job fast and easy. The long-handled tools we use most are:
Books are important tools. If you are just learning to garden, there are many books out there, but for starting out these days, I would go no-dig from the start and avoid a lot of weed problems. If you are on heavy clay, or excavated subsoil (as in subdivisions where the topsoil was stripped off when grading the site,) you may want to till once, after getting a soil test, to incorporate amendments and compost. In the past decade, there has been a major shift in garden practices, based new understandings of soil biology and the soil food web. This recent research confirmed the intuition of no-dig gardeners that disturbing the soil kills the organisms that feed our plants. How-To books for beginning to advanced gardeners: An early pioneer of No-Dig gardening, Charles Dowding has written many books, culminating in the recent No Dig, which makes it easy and accessible. While he gardens in England, his methods are proven in many climates worldwide. I recommend his website and YouTube channel as well. It is simple, attractive, low-key, and gives you the benefit of his decades of experience, which has enabled him to eliminate all the non-essentials. Another online resource is Huw Richards' YouTube channel. Huw is in his twenties, grew up doing organic gardening, and is now working at integrating no-dig and permaculture into a raised-bed home garden. The videos are beautifully shot and very simple. While the climate of the UK is not like mine, I find that American home garden YouTubers are mostly too frenetic, too dogmatic, and too fixated on hacks and tricks. One exception is Epic Gardening (in San Diego), a good resource for the beginning or intermediate urban farmer. The Living Soil Handbook, recently published by farmer Jesse Frost, is the most accessible, simple, and practical book on no-dig that I've found from a US author. It is based on his farm, so he is doing lots of beds full-time, but with hand tools, not tractors. His No-Till Growers YouTube channel and No-Till Market Garden podcast have been pivotal in the rapid exchange of ideas that have transformed small farms and gardens recently. There are many good books and videos from farmers who are experimenting with this, and the No-Till Growers channel is a good way to locate them. While the British YouTube channels usually feature soft music and beautiful gardens, Jesse is punk/jazz on a Kentucky farm, with acerbic humor and plenty of economic realities. Both styles are fun and helpful. The Living Soil Handbook is a guide to doing it. If you want to learn more about the critters in the soil that make the soil food web work, check out Teaming with Microbes, by Jeff Lowenfels and Wayne Lewis. Korean Natural Farming, and it's simplified version, JADAM. are also transforming the garden/farm world with techniques for increasing fertility with locally available microorganisms for free or cheap. Nigel Palmer has written a guide to locating and using local microorganisms, The Regenerative Grower’s Guide to Garden Amendments, from Chelsea Green Publishers. There are numerous how-to videos online from Nigel, Huw Richards, Chris Trump, and others. I've posted simple recipes here. My favorites for the intermediate and advanced gardener: My favorite contemporary garden authors are Carol Deppe and Will Bonsall. For a blend of humor, deep experience, thoughtful innovation, and true vision, they are unequaled. Not that we always agree. I don't use the same irrigation method as Carol, and am not vegan like Will. Neither is no-dig like me. But their books are endlessly inspiring, informative, and useful. Good gardeners don't all garden alike, but they are all observant, flexible, and learn from experience. Carol's books The Resilient Gardener and The Tao of Vegetable Gardening are engaging, humorous, practical, thought-provoking, and absolutely unique. She has been a pioneer of breeding and growing vegetables so that ordinary people can feed themselves through good times and bad. And she gives a lot of thought to what bad times might involve, from a simple back injury to flood, earthquake or total electrical failure. Breed Your Own Vegetable Varieties is exactly what it says, but much more interesting and inspiring than you might think. Will's book is Will Bonsall's Essential Guide to Radical, Self-Reliant Gardening. He has thought deeply during his decades on a Maine farm, and I learned a lot from his well-thought-out methods of composting, weed control., and crop selection. He has an excellent introduction to seed saving. The chapters on companion planting and on using woodchip, grass, and leaves are especially useful. Finally, I highly recommend The Medicinal Herb Grower, by Richo Cech. It is a humorous but deeply observed and deeply-felt book on how to have a green thumb, that is, how to understand what plants need and want from you. Garden Classics that are especially important to me: I learned to garden in the early 80's by reading John Seymour's classic The Self-Sufficient Gardener. His vision of a self-reliant subsistence homestead is still compelling, and his lore on individual vegetables is detailed and includes many perennials. In that respect, he is still fairly unique, with instructions for everything from growing Good King Henry and rhubarb to making parsnip wine and keeping chickens. His climate was similar to the Pacific Northwest, but with much colder summers. (The British climate is warming rapidly, and is no longer so different from ours.) He was publishing around the time (1970's) that rows were giving way to permanent beds in home gardens, under the influence of John Jeavons, Alan Chadwick, and Chinese garden masters. While I no longer dig the beds, I still find Seymour's work invaluable because it was embedded in an entire way of life that sustained generations of cottagers in a largely cashless economy. Eliot Coleman's seminal book The Four Season Harvest, as well as his later books, have been very influential--he is the father of modern winter farming in hoop houses and high tunnels. His daughter Clara now produces the Winter Growers Podcast. I still learn lots about how to use form and color to make beautiful garden pictures by rereading Gertrude Jekyll's classics, especially Wood and Garden. Another great book for training your eye is Color in your Garden, by Penelope Hobhouse. For integrating flowers and design into a food-growing space, get your local library or used book store to find a copy of Joy Larkcom's Creative Vegetable Gardening. The gorgeous photos in this book are matched (for once) by the advice of a shrewd and experienced gardener. Our gardens are part of the nation's agriculture, if a small part. And books that articulate a real vision for the future of agriculture are precious. Wendell Berry has long been an inspiration. Lately, Michael Foley's book, Farming for the Long Haul has expanded and updated Berry's vision with a world-wide view of the possibilities that we could still use, but modern agriculture has forgotten. It is exciting to read about solutions instead of just problems! |